fr
fr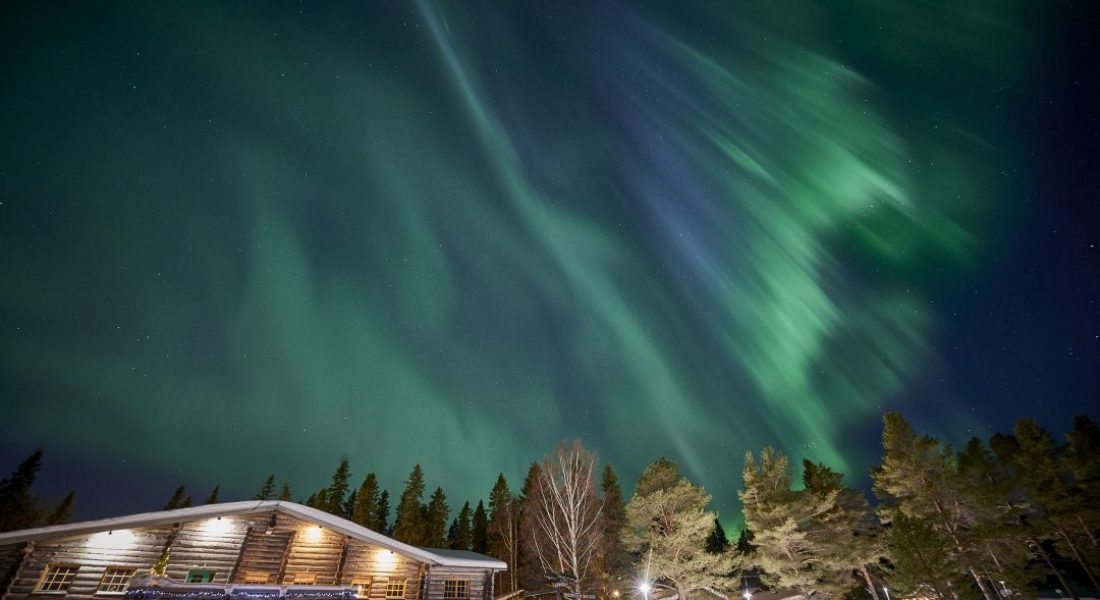
How to Photograph the Northern Lights
1 April, 2018
|At 23.21
Many of our visitors in the Autumn and the Winter dream of seeing the Northern Lights or Aurora Borealis. And if you see it, make sure to creating a lasting memory of the northern lights. Here we share our best tips for photographing the northern lights. But first…
What is the Northern Lights?
The Aurora is an amazing phenomenon of nature, and one of its most beautiful, caused by collisions between electrically charged particles from the sun that enter the earth’s atmosphere and collide with gases such as oxygen and nitrogen.
Auroras in the northern hemisphere are called ‘Aurora Borealis’ or ‘northern lights’ and auroras in the southern hemisphere are called ‘Aurora Australis’ or ‘southern lights’.
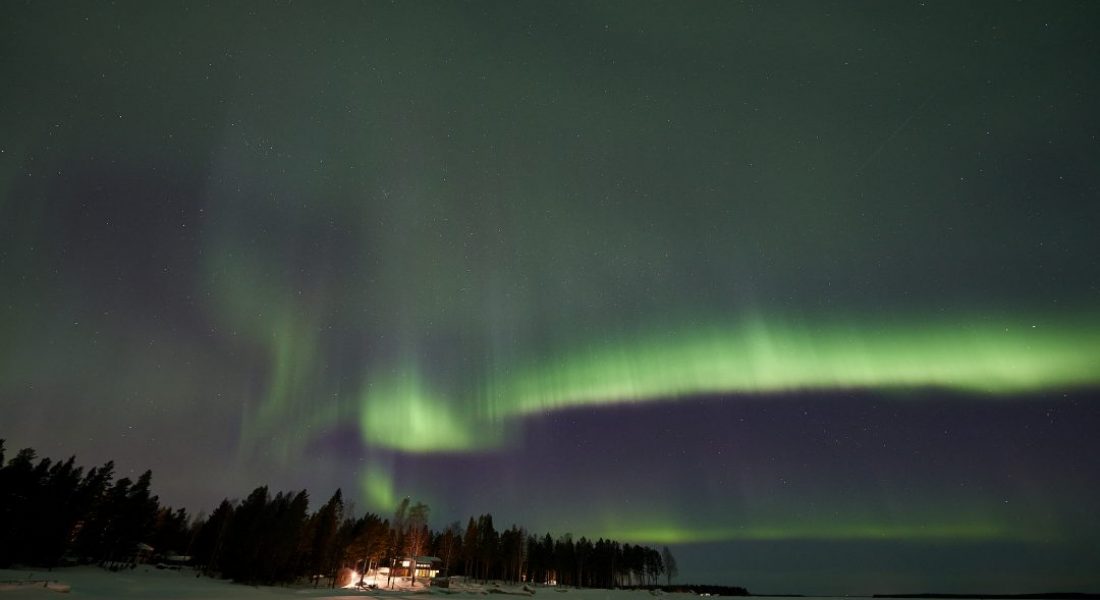
The auroras occur along an irregularly shaped oval around each magnetic pole. Northern lights displays appear in many vivid colors, with green being the most common. Other colors such as red, yellow, green, blue and violet are also seen on occasion. The lights present themselves in many many, different ways from small patches of white light, that you may mistake for cloud, to bands, patches or rippling curtains or even explosions of light.
When to see the Northern Lights
The northern lights are there all year round but this far north we only see them when we have darkness in the autumn, winter and early spring. The lights usually starting appearing the few hours of darkness in late August through to the return of the midnight light in late April. We recommend the best time to see the lights are from early September through to late March.
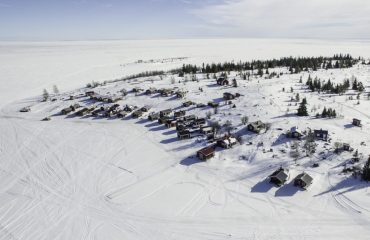
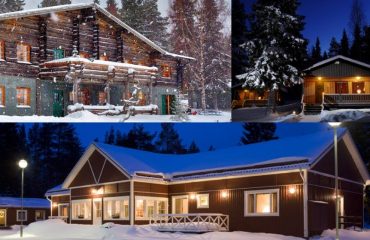
The other critical factors that decide how we see the lights is the level of output of charged particles by the sun and the cloud cover. There are many places around the arctic region to see the lights but you should look for places that have low horizons to the north and/or low statistical percentages of cloud cover. In Swedish Lapland this happens most often in two very different places. One is the village of Abisko, high up in the Swedish mountains, and the other is the view to the north over the Bay of Bothnia from Brändön Lodge or Pine Bay Lodge.
How to Photograph the Northern Lights
Creating a lasting memory of the northern lights is very simple with any modern camera that you are able to operate manually. You may even get an image on a modern phone camera if the lights are strong enough and you have an app that allows a manual shutter speed. If your camera shoots in raw then this is your best option as there is flexibility to fine tune your exposure later on in your computer. Keep in mind however that your goal is to produce photos as realistic as possible. We see some photos where even the snow ends up bright green after the “photographer” has pushed up the color saturation or their camera is not quite able to accurately capture the color balance.
Setting up for your shoot is easy.
You will need:
- 1. Warm clothing. See out how to dress för winter.
- 3. Spare batteries. (These can run out quite quickly in the cold).
- 4. Tripod to keep the camera steady during long shutter times
- 5. Some spare SD cards
- 6. A camera with manual controls (ISO, F-stop, Shutter speed, Focus).
Handy to have are:
- 7. Head lamp with a red light (to see your controls without spoiling your night vision)
- 8. A torch or lamp in your telephone to light up any models
- 9. Gloves with flexible fingers
Where to Photograph the Northern Lights
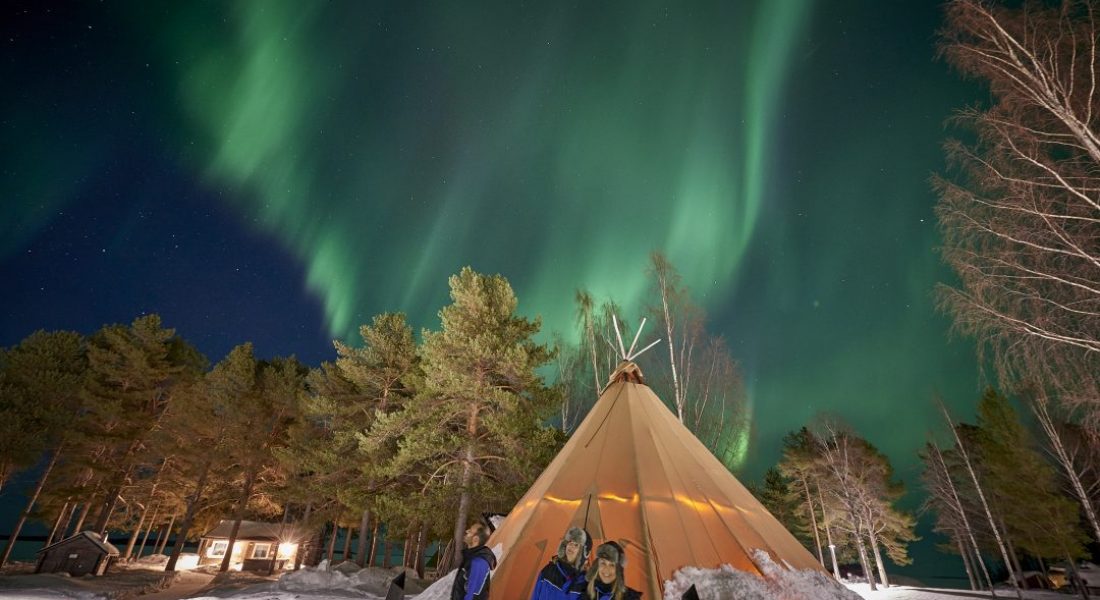
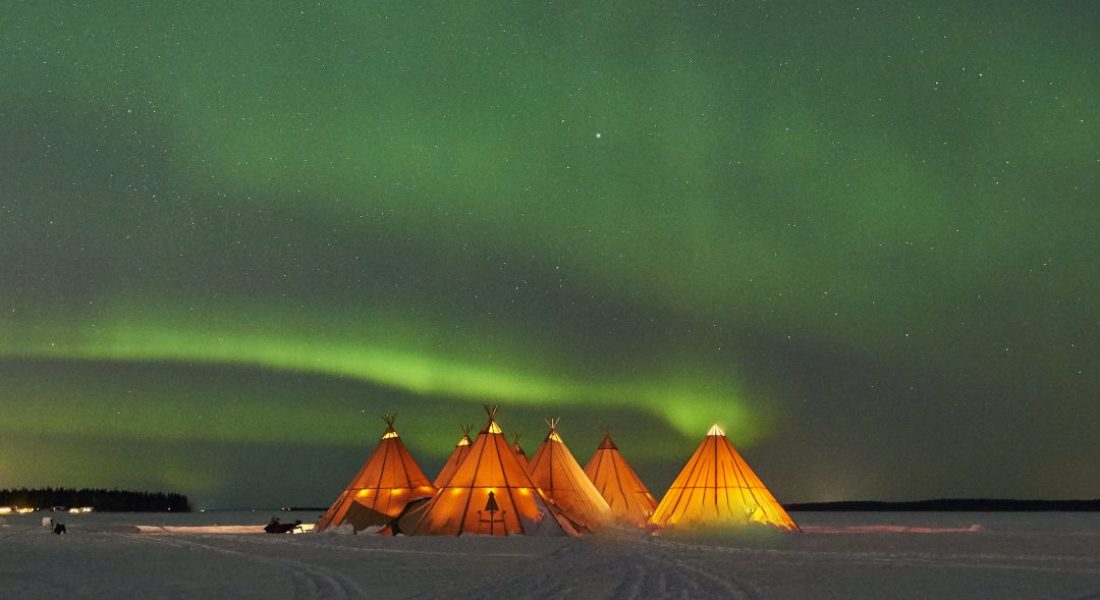
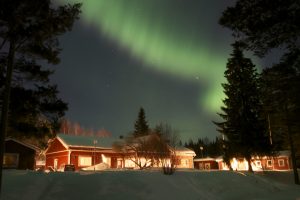
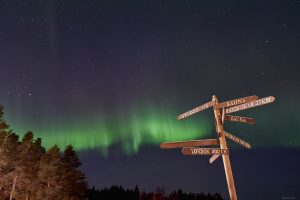
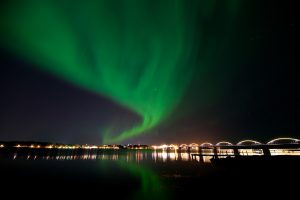
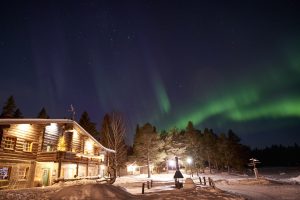
It is also helpful to do some scouting during the day to find good locations and/or angles to take the shots. This scouting also helps you orientate yourself when coming back to these spots in the dark. When looking for great viewing points we are after a place with a good view to the north, a low horizen if possible ,and some interesting features in the scene to give perspective to the photo. For example when taking photos in Luleå we have below made good use of the church in Gammalstad and the Teepee tents on the frozen sea at Brändön as our subjects.

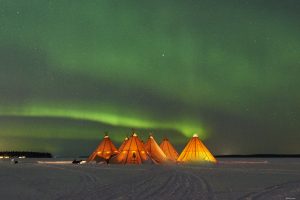
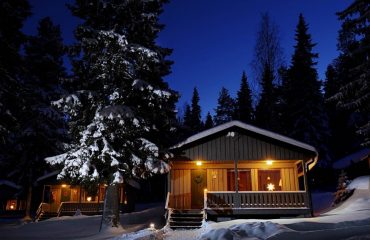
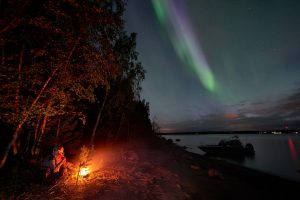
On the night you should keep a close lookout for the lights. They can be quite sporadic on some nights, coming and going at will and it is the dedicated photographer that usually gets the shots. At Brändön Lodge there are several small huts and a teepee tent, overlooking the sea, which are great to relax in in the warmth while checking periodically for the lights to appear.
When looking for the lights keep in mind that they they may start out quite weak early on and appear only as a fuzzy white cloud that is hard to make out. With practice however you will learn to recognize this and hopefully, as the night progresses, the lights will strengthen to enable a great night of photography.
Once the lights do appear it is time to set up your tripod and your camera.
We recommend the following steps:
- Set the ISO to around 800-1600. This varies from camera to camera. The aim is to have an ISO that is sensitive but does not introduce too much grain.
- Set the camera to manual settings (M)
- Set the f-stop to approx f4.0 to f5.6. High enough to have a wide depth of field when focusing on close subjects but low enough to let in a good amount of light.
- Auto focus the camera on a distant object if taking broad landscape style shots of the lights or focus on the subject if it is close by. Then turn off the auto focus now that the focus is set on the required distance.
- Set your shutter speed to somewhere between 5 sec to 20 sec and start taking test shots. Increase or decrease the shutter speed after each shot to obtain the right exposure. As the intensity of the light changes over time you will likely need to periodically adjust your shutter speed.
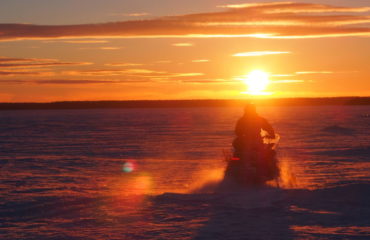
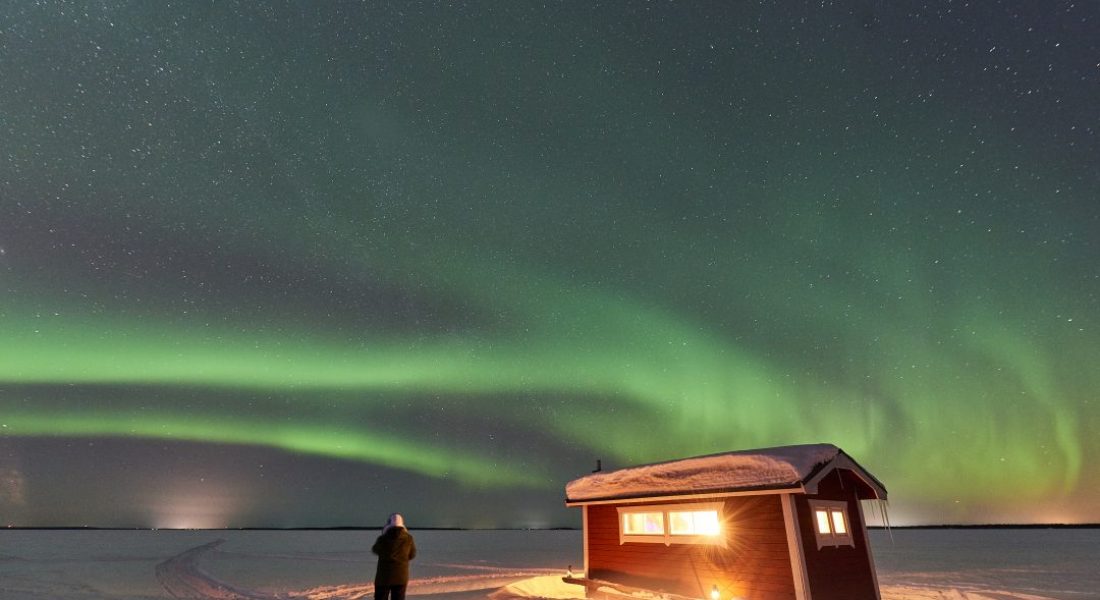
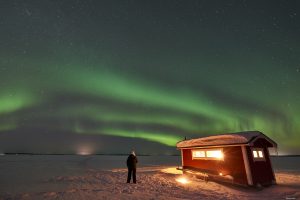
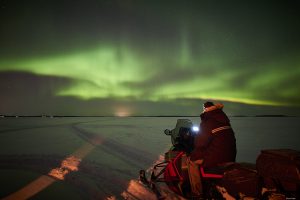
Photos such as the ones below have more impact if you can have an interesting foreground. This might be a bridge, a mountain, a river, a reflection in a lake or even a cabin or a snowmobile.
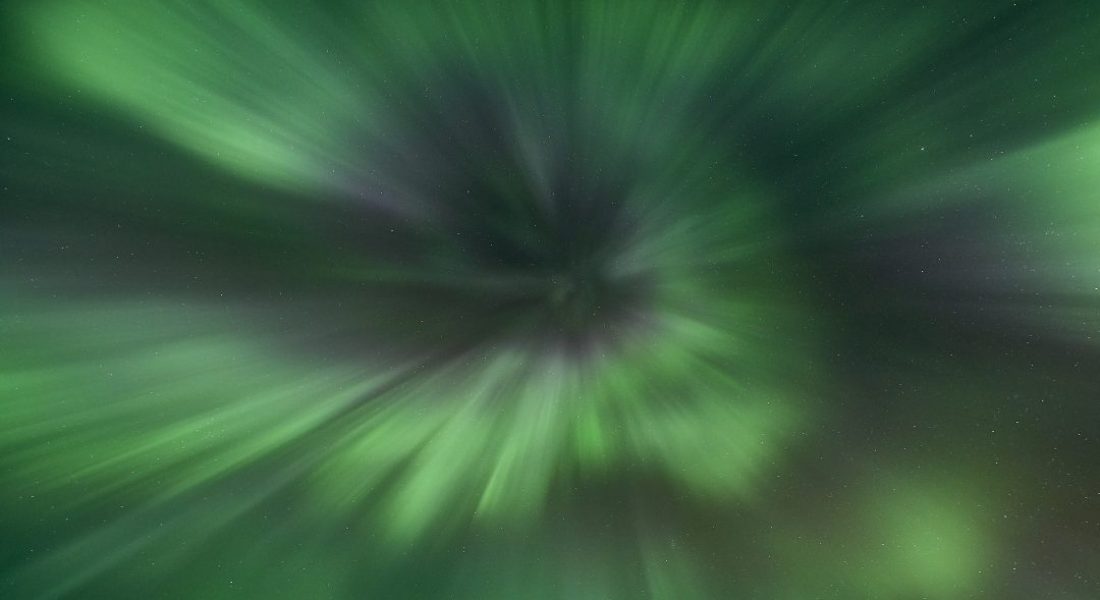
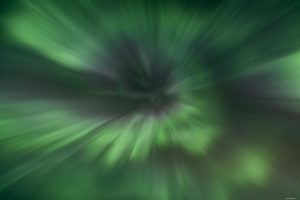
Don’t forget to look up on occasion. The photo below was taken with the camera pointing straight up on the tripod as the aurora exploded overhead.
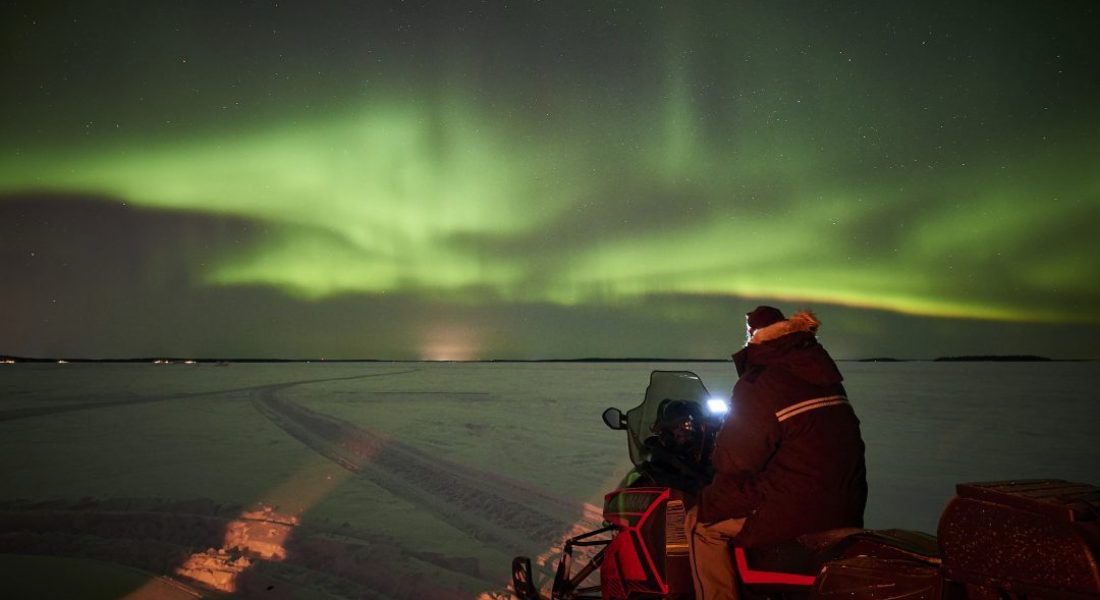
Other interesting shots taken with various subjects in photo
At Brändön Lodge and Pine Bay Lodge we have a lot of interesting activities that include hunting for or photographing the northern lights. In the Autumn we even have a boat tour out to the islands of the Archipelago where we can sit and view the lights in these beautiful and remote locations. Read more about our Northern Lights Activities here.
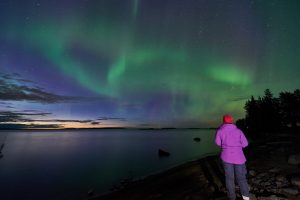
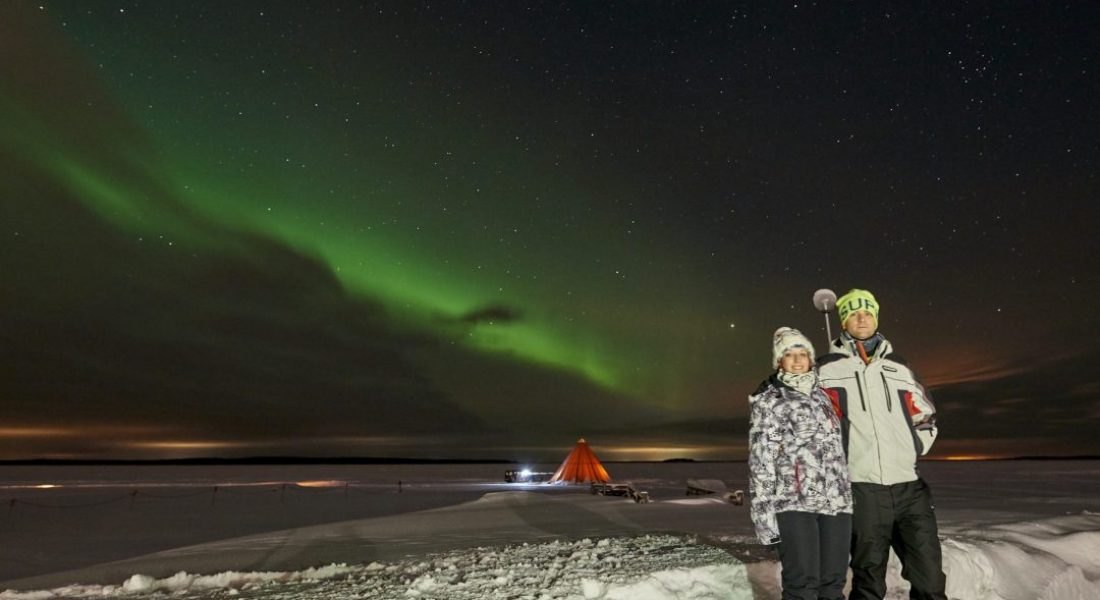
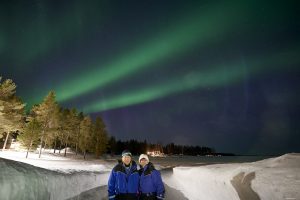
We also need to be innovative when trying to capture the faces of friends or family in our northern lights photos. In the examples below we turned on the auto focus and refocused on the people in the photo. We then turned off the auto focus again and asked out models to stand very still. The shutter was set to approx 10-15 seconds in each case. We then asked out models to stand very still and pushed the shutter release. During the shooting we shone a light on the people taking care not to light up the snow around them too much for about 3-4 seconds. This amount varies depending on the strength of the light, the length of the shutter etc etc. This is something that you will need to fine tune and practice with on the night to get the correct exposure with this most manual of flash techniques.

You are most welcome to contact us and find more information about visiting us and with luck seeing the northern lights.
For even more info about Northern Lights, check out this info from Swedish Lapland